Showing posts with label Crafts. Show all posts

Monday, July 13, 2015

New Classroom Woes!

So today was my first real day in my new classroom-- for those of you who don't know I am switching schools. I will still be teaching 3rd grade gifted, but now I get to teach at the same school with my best friend {EEEK!} The School Belle. Even though she teaching K and I teach 3rd I am super excited to spend time doing what we both love! In fact, Haley already found the most precious T-shirts for us to wear our first day back!

For those of you who don't remember my old classroom.. it looked a little something like this..


However, these last few days I remember it like this..


I LOVED all the natural light that a whole wall of windows gave. I also loved the white walls, since they match any classroom decor. And don't even get my started on my carpet. I may cry if I think about my beautiful carpet. Also, the storage was AMAZING. I didn't think it was amazing at the time, but now I know.

Anyway, I have started moving in to my new classroom, which will in its dreams be as beautiful as my old classroom-- but it has a LOONNNGGG way to go!

My goal is to reveal my classroom on August 1st, so I have some work to do, but so I can get myself jazzed about this.. were gonna go through the positives.


My entire back/ side wall is made up of these movable panels, which are HUGE! Some are bulletin board (ohhhhh yeeahhhh..) but others are pale yellow and I want to be a primary color but I'm actually not in this shade blue. Also I had about 40 foldable chairs, which the custodian moved for me today :) Don't forget to look at that adorable window. 


I have another huge bulletin board at what is going to be the front of my room and some pretty stellar cubbies that are currently filled, but will not be tomorrow! 


Then there is the storage. Ok, I am exaggerating, I have two of these, so I can make it work, but Ms. Winter is going to NEED to stay super organized this year! 

And finally a panorama (it looks weird because I can not follow that line)! And let me just say this makes my classroom look HUUUUGGEE!


I am up for the challenge to make this place my cozy classroom home! All my instagram followers will be getting sneak peaks as I go through the process, so follow me @mswinterswildwest! 

Tuesday, April 28, 2015

Earth Day Celebrations!

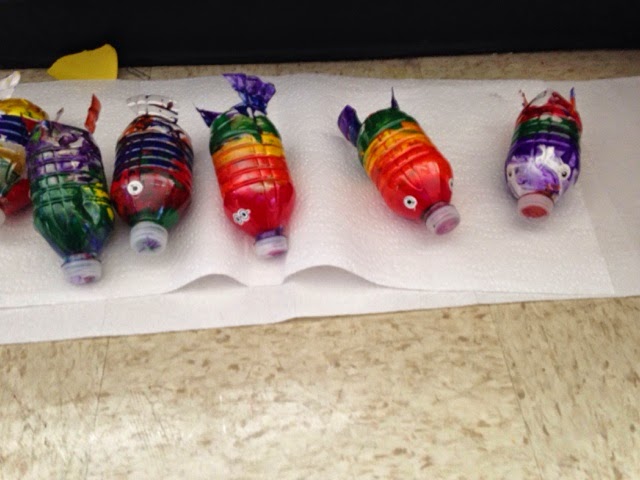
Last week we had a wonderful time celebrating Earth Day! We read some wonderful stories, wrote an informational pamphlet, wrote our own story, created crafts from recycled materials and even created our own paper from recycled scraps in the classroom!

First, our favorite Earth Day books were 


All three of these titles are engaging and information packed! They are great for classes both young and old. 

After reading the Adventures of an Aluminum Can and Adventures of a Plastic Bottle, my students sequenced the steps it took for the bottle to turn into a (SPOILER ALERT) spacesuit, and the can to turn into (DOUBLE SPOILER ALERT) a baseball bat. 

On the next day, we learned about the process of making paper from trees. We watched this video and sequenced the steps as a class. We were careful to use specific vocabulary in our sequencing. 


After, we wrote our very own story: Adventures of a Sheet of Paper. We modeled this book after the Adventures of a Plastic Bottle and Adventures of an Aluminum Can. Since we have been learning about figurative language in Reading, I encouraged my students to use this in their stories. Here are some examples of the pages. 


I will upload the cover and the rubric ASAP! I am so impressed with all the work my students did. Many of their books were both funny and informative! 

The next day we made paper. I used a kit here at school, but all you need is a screen, a mold (cookie cutters work just fine for small pieces), a sponge, felt, a blender, water and small scraps of paper.

1. Students tore scraps of paper into small pieces. We chose to separate them by color so our paper would not be too dark, but you don't have do to this. 

2. Fill the blender about 2/3 full of water. Add the scraps of paper.

3. Blend the paper until it is the consistency of oatmeal. 


4. Place a piece of screen in a bucket filled with water. Pour the pulp into the mold. 


5. Take the screen out of the water and let it drip dry. Remove the mold. At this point, we also added seed to make our paper plantable. 


6. Place another piece of mesh on top of the paper. Press it with a sponge. 


7. Remove the paper from one of the mesh screens, press down with a piece of felt, this process is called couching (KOOCHing).


8. Lay the newly formed paper on cardboard to dry over night!

Another teacher at my school, Ms. Simmons, and her class joined us for our Earth Day. She found this idea on someones blog, which I will ask her about so we can give credit! They came out so very cute!!!


We ended our Earth Week with a yummy treat- dirt pudding. I can't wait to celebrate again next year. Hopefully I will I will have all my printables up on TpT by then as well. Only a year away-- A girl can DREAM! 

Tuesday, July 29, 2014

Tried It Tuesday


Well. after being inspired by Pinkadots Elementary's Made It Monday, I decided to glam up my own paper sorter! I did not spray paint it, however I did add in the inserts so you can't see the paper in the door. I am linking up with Fourth Grade Flipper for Tried It Tuesday.


In order to make the inserts, I measured the drawers and cut my scrapbook paper to the correct length. Then I used KG Wake me up to make white letters with a grey outline. After printing the letters, I cut them out and colored the middle with a black sharpie. Then I glued the letter to the scrapbook paper and laminated. Pinkadots used card stock instead so they didn't laminate, but my paper was kind of flimsy! I then hot glued each of the inserts in the drawer. It is now much cuter than before! Thanks Pinkadots!!! Here is my final product:


I also got word that I will soon be able to get into my classroom! (*huge sigh of relyef*) So I printed, laminated and cut my labels for all my bins. Can't wait to show you the final product!!


Well, hopefully I'll have some classroom pics for tomorrow!

Monday, July 22, 2013

Back to School Made It Monday

Today I had a very productive day back at school! So I have a few "made its" this Monday!

First, I create my "When you enter this room" sign. I didn't have much room so I had to be creative, but I really like the way it came out!

I was unable to use all the ones I wanted because of the size, but with the help of CC Fonts, it turned out so precious! 


With the help of my amazing future teacher friend, Brooke, I was able to get tons done in my classroom! I set up my word wall and I am almost done my library! Once I am done I will upload some pictures, but I don't want to spoil the surprise :)

But for my real Made It Monday, I finally finished my Bubble Multiplication Centers!


 Brooke even helped me cut them out so they will be all ready for the kids! I absolutely love the clipart from Melonheadz!

I am absolutely loving being back in my classroom, especially since it is so clean :)

Happy Teacher Prep!!
Ms. Winter